

How to Create Interactive Digital Flipbooks
As the digital landscape continues to evolve, businesses are constantly searching for innovative ways to captivate their audience. While print brochures and catalogs still hold value, digital flipbooks provide a more interactive and flexible solution. With Fliplify’s intuitive drag-and-drop editor, creating visually stunning flipbooks with interactive elements has never been easier. In this post, we’ll walk you through the step-by-step process of crafting engaging digital flipbooks using Fliplify.

Step 1: Sign up for Fliplify
To get started, visit the Fliplify website and sign up for an account. Fliplify offers a range of subscription plans to suit different needs, including a free trial option. Once you’ve signed up, you’ll have access to the drag-and-drop editor and other features.
Step 2: Choose a Template or Start from Scratch
Fliplify provides a variety of pre-designed templates to help you kickstart your flipbook creation process. Browse through the available options and select a template that aligns with your brand and content. Alternatively, you can start with a blank canvas and design your flipbook from scratch.
Step 3: Customize the Look and Feel
With Fliplify’s drag-and-drop editor, you have full control over the appearance of your flipbook. Customize the colors, fonts, and layout to match your brand identity. Ensure that the design is visually appealing and easy to navigate for a seamless user experience.
Step 4: Add Interactive Elements

One of the key advantages of digital flipbooks is the ability to include interactive elements. Fliplify allows you to effortlessly incorporate buttons, links, videos, and more into your flipbook. This interactivity not only enhances engagement but also provides a means for readers to take action, such as making a purchase or contacting your business.
Step 5: Preview and Test
[Image]
Before publishing your flipbook, it’s crucial to preview and test it thoroughly. Check for any design inconsistencies, broken links, or other issues that may affect the user experience. Fliplify’s preview feature allows you to see exactly how your flipbook will appear to readers.
Step 6: Publish and Share
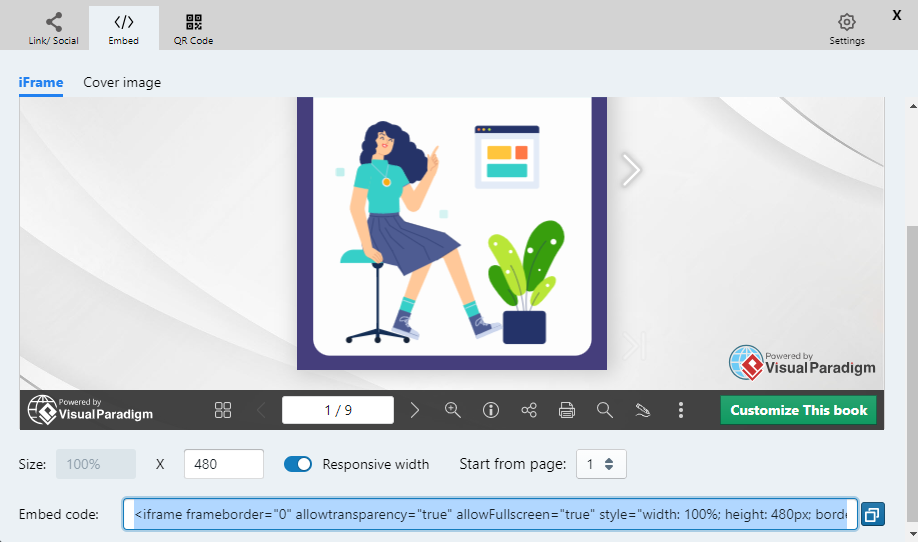
Once you’re satisfied with your flipbook, it’s time to publish and share it with your audience. Fliplify provides various options for sharing your flipbook, including embedding it on your website, sharing it on social media, or sending it via email. Consider your target audience and choose the distribution channels that will reach them most effectively.
FAQs:
Q: Can I create flipbooks with Fliplify if I don’t have design experience?
A: Absolutely! Fliplify’s drag-and-drop editor is user-friendly and requires no design experience. You can easily customize templates or start from scratch with intuitive tools.
Q: Can I track the engagement and performance of my flipbooks?
A: Yes, Fliplify offers analytics and tracking features to monitor the engagement and performance of your flipbooks. You can track metrics such as page views, click-through rates, and time spent on each page.
Q: Can I integrate my flipbooks with my blog post?
A: Absolutely! Fliplify offers seamless integration options to embed your interactive flipbooks directly into your blog posts. This allows you to enhance your content with engaging visuals and interactive elements, capturing the attention of your readers and keeping them on your page for longer
Digital flipbooks offer an interactive and engaging way to present your content. With Fliplify’s drag-and-drop editor, you can easily create visually appealing flipbooks and add interactive elements that captivate your audience. Sign up for Fliplify today and start enhancing your digital marketing efforts with interactive flipbooks.


